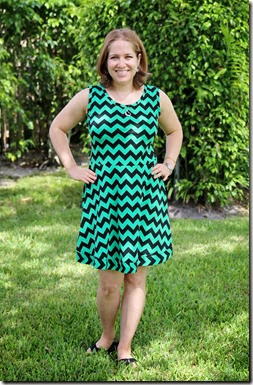
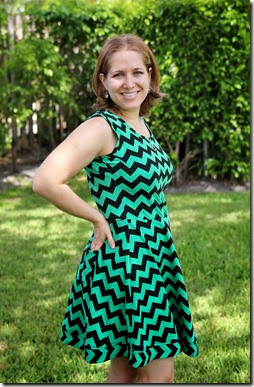
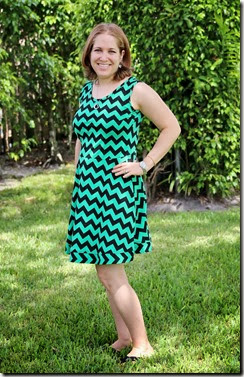
When I saw Sara from Sew Sweetness post about her Lady Skater, I knew I had to make one. I’d had green and black chevron in my stash, from when I pinned this dress from Make It Funky. I live in Florida, and all I’ve been wearing this summer are dresses. I’ve also been really into knits. I particularly like sewing with knits because I find them very forgiving, and they don’t require a zipper. I don’t have issues with putting in the zipper, but when I have to rip things out to fit with the zipper (which I usually do), knits are just easier.
I purchased the pattern from Kitschy Coo, and after assembling my pdf pieces, I made some changes right away. Based on the other dresses I’d seen, I shortened the bodice by about an inch using the shortening line. I also shortened the skirt. I had to shorten it more than I’d intended because I only had a yard of fabric. I also made the armholes slimmer so it would look more like a tank than a sleeveless dress. During assembly, my knit needle and stretch stitches were behaving rather funky, so I just sewed the whole dress with a regular needle and straight stitch, and since there's plenty of ease, I'm not worried about straining the seams.
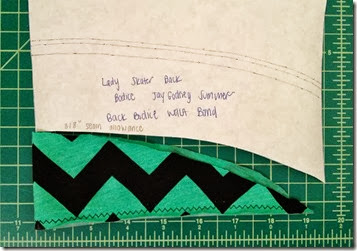
After I had it all assembled, I had to do some fitting. I added bust darts around the armpits, which is actually an ideal spot for them because it fits great, and they’re barely noticeable in the finished dress. I also took it in at the shoulders by about an inch, and had to do a MAJOR sway back adjustment. I usually don’t do FBAs, but I have done several sway backs. I actually didn’t know this adjustment had a name until this project. I read about it on Amanda’s site, where she gives lots of helpful hints for fitting the pattern. I got more info about this adjustment here. The photo below shows the piece I removed from the back bodice, folded in half, and where I’ve removed the same piece from my paper pattern for future editions of this dress (and reading what I’ve handwritten will give you a clue as to what’s coming in Lady Skater #2).
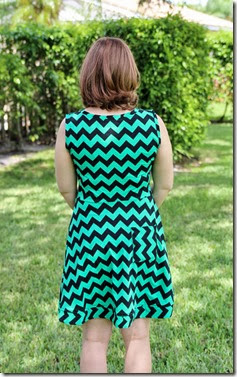
Because I only had a yard of fabric, the dress came out a bit too short. I had to order another 1/2 yard of fabric. Girl Charlee, my primary source for knits, was sold out, and Etsy came to the rescue. I used the 1/2 yard to create a hem band. I cut 4 strips of the fabric 4.5 inches wide, pieced two together for the front and two for the back, ironed in half, and sewed it to the bottom of my skirt, right sides together, with a 3/8” seam allowance. The length correction is a happy accident, because I really love the visual interest the opposite directional chevron creates. I also added a back pocket so I would have a place for my lens cap and could wear this dress to photo shoots! For the back pocket, I cut two pieces 5” x 6” and sewed them right sides together with a 1/4” seam allowance.
I purchased the pattern from Kitschy Coo, and after assembling my pdf pieces, I made some changes right away. Based on the other dresses I’d seen, I shortened the bodice by about an inch using the shortening line. I also shortened the skirt. I had to shorten it more than I’d intended because I only had a yard of fabric. I also made the armholes slimmer so it would look more like a tank than a sleeveless dress. During assembly, my knit needle and stretch stitches were behaving rather funky, so I just sewed the whole dress with a regular needle and straight stitch, and since there's plenty of ease, I'm not worried about straining the seams.
After I had it all assembled, I had to do some fitting. I added bust darts around the armpits, which is actually an ideal spot for them because it fits great, and they’re barely noticeable in the finished dress. I also took it in at the shoulders by about an inch, and had to do a MAJOR sway back adjustment. I usually don’t do FBAs, but I have done several sway backs. I actually didn’t know this adjustment had a name until this project. I read about it on Amanda’s site, where she gives lots of helpful hints for fitting the pattern. I got more info about this adjustment here. The photo below shows the piece I removed from the back bodice, folded in half, and where I’ve removed the same piece from my paper pattern for future editions of this dress (and reading what I’ve handwritten will give you a clue as to what’s coming in Lady Skater #2).

Because I only had a yard of fabric, the dress came out a bit too short. I had to order another 1/2 yard of fabric. Girl Charlee, my primary source for knits, was sold out, and Etsy came to the rescue. I used the 1/2 yard to create a hem band. I cut 4 strips of the fabric 4.5 inches wide, pieced two together for the front and two for the back, ironed in half, and sewed it to the bottom of my skirt, right sides together, with a 3/8” seam allowance. The length correction is a happy accident, because I really love the visual interest the opposite directional chevron creates. I also added a back pocket so I would have a place for my lens cap and could wear this dress to photo shoots! For the back pocket, I cut two pieces 5” x 6” and sewed them right sides together with a 1/4” seam allowance.
